Installing the terminals, bolts, washers, screws and cables on a LiFePO4 battery correctly is critical to ensure proper electrical connections and safe operation. However, the sequence can be confusing for first-time installers. This blog post will walk through the proper order to install each component.
Reasons the Correct Sequence Matters
Following the right sequence:
– Prevents short circuits and polarity reversals that can irreversibly damage the battery.
– Ensures proper torque specifications to avoid loose connections and terminal meltdowns.
– Positions insulation and washers correctly to prevent electrical fires.
– Avoids having to disassemble and restart if mistakes are made!
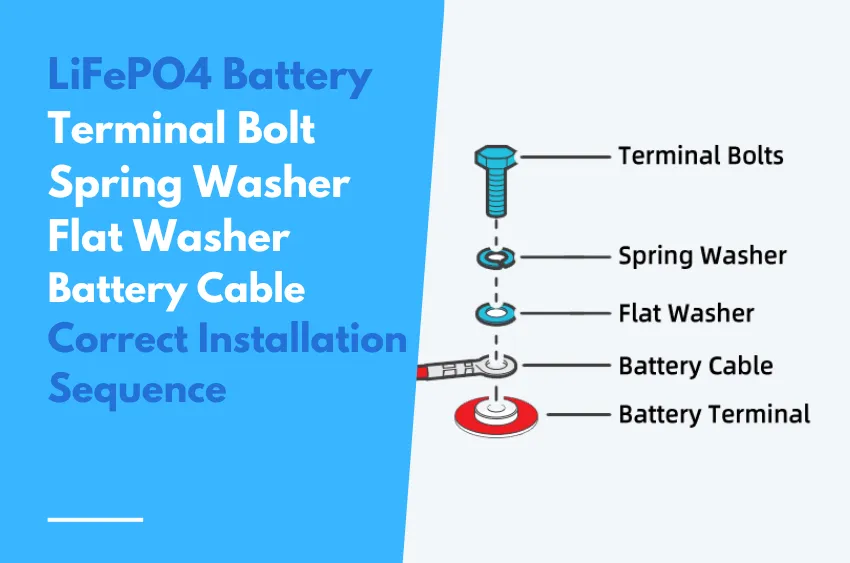
Install LiFePO4 Battery Terminals Sketch Map
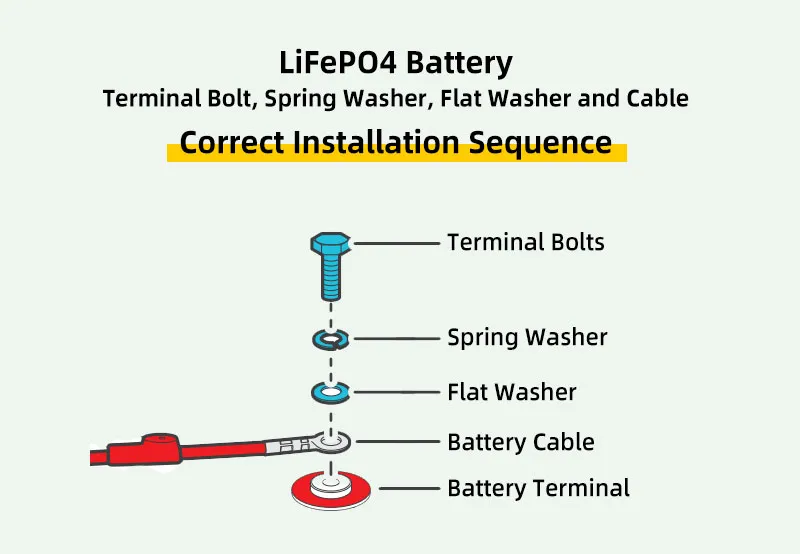
• Ensure the cable lug and the top surface of the terminal are in contact, and place the washers on top of the lug. Do not place the washers between the battery terminal and the cable lug to avoid high resistance and excessive heating.
• Avoid short-circuiting the battery terminals to prevent irreversible damage to the system and battery caused by current bursts.
• Verify polarity before wiring to avoid irreversible battery damage due to polarity reversal.
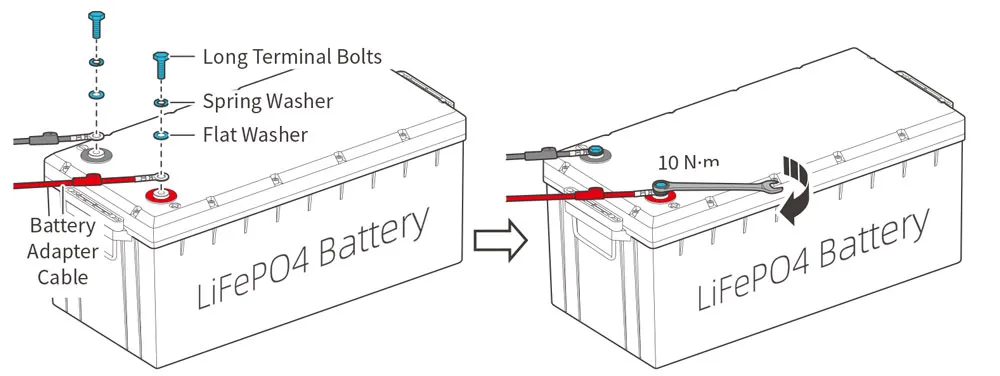
• To ensure safe and reliable operation of the system, please follow the manufacturer’s recommended torque specifications when securing cable connections. Over-tightening can result in terminal breakage, while loose connections can lead to terminal meltdown or fire. When securing multiple cable lugs on a single battery terminal, use Long Terminal Bolts.
Conclusion
Following the manufacturer’s recommended sequence for installing LiFePO4 battery components prevents damage and ensures safe, reliable operation. Let us know in the comments if you have any other installation tips!